You can build a custom interface on a SharePoint list by pairing two Copilot in SharePoint features: an HTML view designed around the job people come to the list to do, and an interactive form that makes the changes. You find and check an item in the view, a button on the view hands it to Copilot, and the form opens to update it.
The prompts I prepared for the view, the form and the skill are on this page, along with the follow-ups it took to get there. I built it on an onboarding list holding 60 tasks for 4 new starters: a view with no summary cards or charts, a checklist form that updates several tasks in one go, and a skill that opens that form for whoever you name.
Before you start
- Copilot in SharePoint. You build the view, the form and the skill through Copilot in SharePoint, so the person building them needs a Microsoft 365 Copilot licence.
- Both features in your tenant. HTML views and interactive forms are still rolling out at the time of writing, so one or both may not have reached you yet.
- A list with the right columns. The view groups, filters and colours by column, so the structure has to be there first. Step 1 covers mine.
Everything below comes from a demo tenant with sample data. The new starters and their tasks are fictional.
Why leave the dashboard out?
This is how I’m explaining HTML views to clients: think of one as a custom interface on top of your list. Not just a pretty dashboard and not just a way to search, but the place you take action.
You open a list because you’ve got something to do. With onboarding, that’s finding a new starter, seeing where they’re up to and marking off what got done today. A dashboard doesn’t help with any of that. Cards across the top, a chart and a table underneath look good, and then you need to change a record and you’re back in the rows.
So the first lines of my view prompt rule the dashboard out and name the job. If a summary is what you need, an HTML list view built as a dashboard or a multi-tab view is the better fit.
Step 1: Build the list from a plan
I write the list as a Markdown file before I ask Copilot for anything: the list name, every column with its type and internal name, the exact options for each choice column, the sample data and what done looks like. Then I give the file to Copilot in SharePoint and ask:
Review this Markdown file. It contains the information architecture for our Onboarding Tracker list. Read it, understand it, then build it.
The list is one row per task. These are the columns the view and the form rely on:
| Column | Type | Notes |
|---|---|---|
| Task | Single line of text | The Title column |
| Task ID | Single line of text | ONB-001 onwards |
| New starter | Single line of text | Full name |
| Role | Single line of text | Job title |
| Department | Choice | Finance, Sales, Marketing, Operations, IT, People and Culture |
| Start date | Date | The new starter’s first day |
| Phase | Choice | Before day one, Day one, First week, First month |
| Step | Number | Order of the task, 1 to 15 |
| Owner team | Choice | People and Culture, IT, Manager, Payroll, Facilities |
| Assigned to | Person | One person |
| Due date | Date | A plain date, not calculated |
| Status | Choice | Not started, In progress, Blocked, Done |
| Completed date | Date | Filled when Status is Done |
| Notes | Multiple lines of text | Plain text |
Step 2: Prompt the view around the job
Open the list, open Copilot in SharePoint and paste this in. Swap the column names and the job for your own list.
Create an HTML view called “Onboarding Desk”. This is not a dashboard. Don’t add summary cards, totals or charts. It’s the screen people use to work through onboarding tasks: find a new starter, check where they’re up to, and update a task.
Lay it out in two panels.
Left panel, “New starters”: one entry per person in New starter, sorted by Start date with the earliest first. On each entry show their name, Role, Department, Start date and a progress line such as “9 of 15 done” with a thin progress bar. Under the progress line, show in red the number of overdue tasks if there are any, and in amber the number of Blocked tasks if there are any. Clicking a person selects them and highlights their entry. Select the first person when the view opens.
Right panel: the selected person’s checklist. At the top show their name, Role, Department and Start date, and whether they start in X days, start today or started X days ago.
Below that, list their tasks grouped by Phase in this order: Before day one, Day one, First week, First month. Sort the tasks in each group by Step. Show the number done in each group heading, such as “Before day one, 6 of 7 done”.
Each task is one row showing: a status pill (Not started grey, In progress blue, Blocked amber, Done green), the Task, Owner team, Assigned to, Due date and the Task ID in small text. Show Notes underneath in small text when there are any. Grey out and strike through tasks that are Done.
A task is overdue when its Due date is before today and its Status is not Done. Work that out from today’s date each time the view opens. Mark overdue tasks with a red “Overdue by X days” label.
Above the checklist add a row of filter pills for Owner team: All, People and Culture, IT, Manager, Payroll, Facilities. Choosing one shows only that team’s tasks for the selected person. Next to them add a “Hide done” toggle.
On each task that is not Done, add two small pill buttons:
- “Mark done”: copies this text to the clipboard: Mark onboarding task [Task ID] as Done and set the Completed date to today.
- “Update”: copies this text to the clipboard: I want to update onboarding task [Task ID]. Replace [Task ID] with that task’s Task ID. After copying, change the button text to “Copied” for two seconds.
In the header of the right panel, next to the person’s name, add a button “Work through checklist” that copies this text to the clipboard: Open the onboarding checklist for [New starter]. Replace [New starter] with the selected person’s name.
At the top of the left panel add a button “Add new starter” that copies this text to the clipboard: I want to add a new starter.
All of these buttons behave the same way: copy the text, then show “Copied, paste into Copilot” for two seconds.
On every task add an “Open” link that opens the item’s form in a new tab.
Above both panels add a search box that searches Task, New starter and Task ID. When there’s text in it, replace the right panel with the matching tasks across all new starters, each showing the new starter’s name.
Show dates like 16 Nov 2026. Use plain HTML and CSS with no external libraries. Keep the design clean, with plenty of white space, and make the left panel about a third of the width.
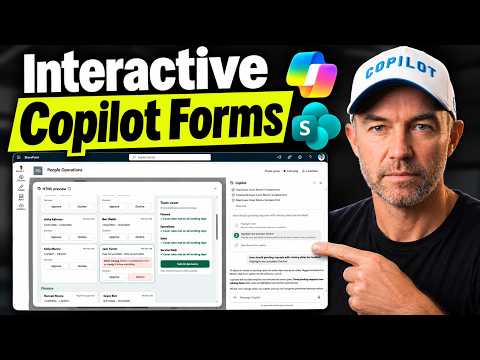
Copilot built the view with the new starters down the left, each showing a count such as 12 of 15 done, a percentage, and any overdue or blocked tasks in red and amber. The selected person’s checklist sits on the right, grouped by phase, with Mark done, Update and Open on each task. Searching a name or a task brought back the matching tasks, the Owner team pills filtered the checklist, and Hide done cleared the finished ones. There are no summary cards and no charts in it.
Step 3: Ask for the checklist form as a template
The view shows you where someone is up to. To change several tasks at once you need a form, and I didn’t want one built for a single person.
Create an interactive form called “Onboarding checklist”. Build it as a reusable template that works for any new starter in this list, not for one person. Don’t put any person’s name or tasks into the template itself.
Before you open the form, ask me which new starter it’s for, and list the new starters in this list so I can pick one. Then open the form filled in with that person’s details.
Show their name, Role and Start date at the top, then every task of theirs that is not Done, grouped by Phase. For each task let me set Status with one click (Not started, In progress, Blocked, Done) and add a note. Show how many tasks I’ve changed next to a “Save changes” button. When I submit, update only the tasks I changed, and set Completed date to today on any I set to Done. Match the look of the Onboarding Desk view: same colours, same status pills, same fonts.
Copilot came back with a question before it built anything: which new starter? It gave me a picker listing the people in the list. I chose Tom, and the form opened with his 9 open tasks grouped by phase, the four statuses as one-click pills on each task and a notes box beside them.
Save changes sends your changes to Copilot as a message, and Copilot updates the items in the list. My article on interactive forms in SharePoint goes through what happens between submitting a form and the list changing.
Step 4: Save it in Site Assets and run it with a skill
Once the form works the way you want, keep it. This is the prompt I’d prepared. On camera I said it in my own words: turn the picker and the checklist into one complete form, save it in the Site Assets library, and create a skill that runs it.
Make this a skill called onboarding-checklist. Save the form as a template file in the Site Assets library, with no person’s details saved in it.
When I ask to open the onboarding checklist and name a new starter, use that person. When I don’t name anyone, ask me who it’s for and list the new starters who still have open tasks. Then find that person’s tasks in the Onboarding Tracker list, open the form from the template filled in with their current values, and update the items after I approve.
The first time I ran the skill, the checklist opened with the person’s name and no tasks. I told Copilot exactly that: the checklist is blank, it has the name but none of the items, fix it. After the fix it listed the tasks. I ran it again for Priya, who had 1 of 15 done, marked 3 more as done in the form and saved. The view then showed 4 of 15.
If skills are new to you, start with what SharePoint skills are and how to build one.
Step 5: Join the view to the form
The view already has a “Work through checklist” button beside the selected person’s name. It copies “Open the onboarding checklist for” followed by their name. Paste that into Copilot in SharePoint, the skill picks up the name, and the form opens for that person with no picker.
There are two ways in. Name the person, from the button or by typing it, and you go straight to their checklist. Ask for the onboarding checklist with no name and you get the picker.
Getting both to work took a bit of toing and froing. I first asked the skill to drop the picker and use the name from the button, then asked for the picker back for when no name is given. One run hit an error and recovered, and one passed the name through without opening the form, so I ran it again.
I also asked for the button to send its request to Copilot through the same dialog the form uses, so there’d be no paste. We couldn’t get that to work, so the button stays as a copy.
Write down what people come to the list to do
That one sentence does most of the design, so I’d settle it before opening Copilot. Four things I’d hold to:
- Finish the sentence “people open this list to”. For onboarding it was find a new starter, check where they’re up to and update a task. It went into the prompt almost word for word.
- Leave a chart out unless somebody acts on it. The count of overdue tasks in red next to a person’s name stays, because it tells you who to click on.
- Put the structure in choice columns. My view groups by Phase, colours by Status and filters by Owner team, and all 3 are choice columns with fixed options. I haven’t tried this over a free-text Status column.
- Keep people out of the template. The form holds no names. It’s filled in from the list each time it opens, so it works for whoever starts next.
The list is still where the data lives. Every change made through the form lands in a column you can filter and report on, and Copilot in SharePoint works within the permissions of the person using it.
What to watch for
- The view can’t write to the list. Its buttons copy a request for Copilot, so there’s a copy and paste between the view and the form. The Open link takes you to the standard item form.
- A first run can come back wrong. Mine opened a blank checklist. Say plainly what’s wrong and what you expected, and ask for a fix.
- Overdue is worked out when the view opens. The prompt tells the view to compare Due date with today’s date each time, so the red labels stay current without anyone updating a column.
- The prompt names my columns. Swap in yours before you paste it.
Frequently asked questions
Can the same list have a dashboard view as well as this one? Yes. A list can hold more than one HTML view, and each sits beside All Items in the view switcher. You could keep the Onboarding Desk for the people doing the tasks and add a summary view for a manager.
Where does the interactive form live once it’s saved? I asked for the template to be saved in the Site Assets library and didn’t open the library on camera afterwards to check. In my interactive forms build the template was in Site Assets and the skill appeared under Site contents, then Agent Assets, then Skills, as a folder with a SKILL.md file inside.
What does the checklist form show while you work? Each open task has the four statuses as one-click pills and a notes box, grouped by phase. In mine, Copilot’s reply said Tom’s checklist was open with 9 not-Done tasks and that the form tracks changed tasks beside Save changes.
Will the view prompt work on a list that isn’t about onboarding? The first four sentences will: name the view, rule out the dashboard and state the job. The rest of the prompt names my columns and my two panels, so rewrite those parts around what people come to your list to do.